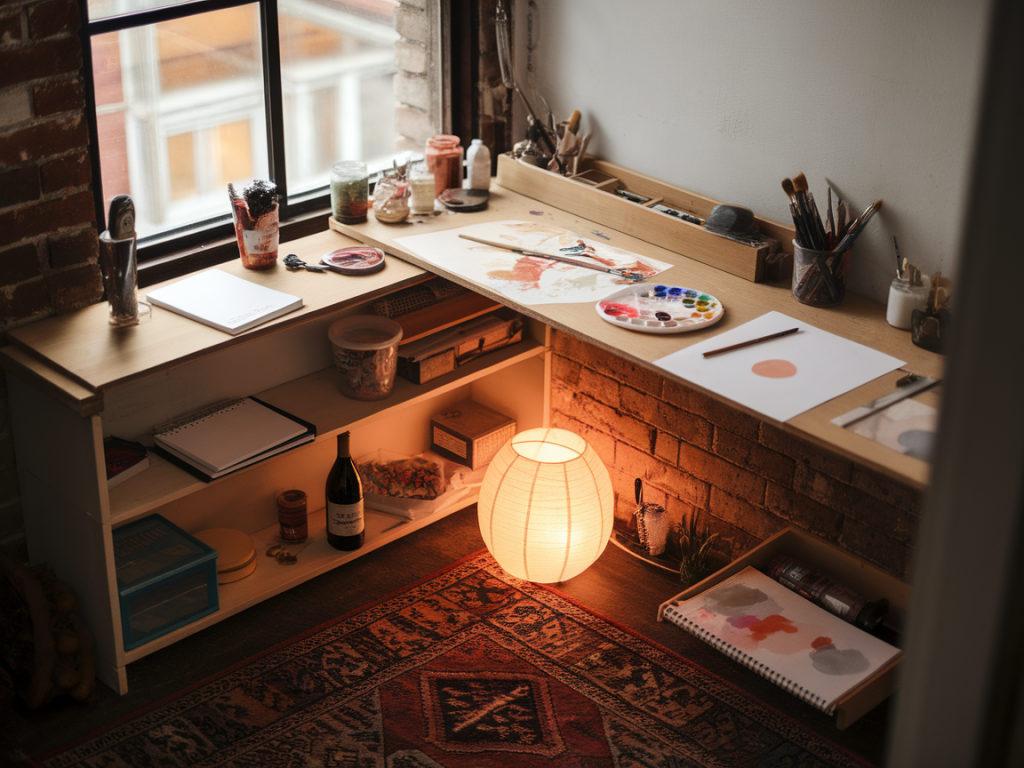
Working in a compact studio doesn’t have to feel like a compromise. Over the years I’ve learned that small corners, properly thought through, become powerful workflow zones for mixed-media practice. They don’t need to be glamorous or expensive — they need to be intentional. Below I share the ways I break down tiny spaces, prioritise tasks, and kit them out so a 2m x 2m corner can support collage, painting, printmaking experiments and all the in-between mess.
Start by mapping your actual workflow
The single most useful step is to watch yourself work for a week. Note down the repeatable steps in your process: prepping papers and grounds; cutting and collage; mark-making (gouache, ink, acrylic); drying/flattening; photographing; and storage of both works-in-progress and materials. Once you have a map, you can design zones that reflect the rhythm of your practice.
My simplified map looks like this:
- Preparation (gesso, sizing, priming)
- Assembly (collage, layering)
- Making (painting, drawing, mark-making)
- Drying / flattening
- Documentation and storage
Define micro-zones, not full rooms
In a tiny studio corner I avoid trying to recreate a full studio. Instead I designate micro-zones — areas allocated for specific tasks that can overlap physically but are distinct mentally. For example:
- Prep shelf: jars, gesso, sizing, sandpaper and reusable palettes.
- Wet station: a small, wipeable tabletop area for paints and inks with a water bucket underneath (or a collapsible silicone bowl).
- Drying rack: vertical or wall-mounted to save floor space.
- Tool caddy: mobile container for brushes, blades, palette knives and pens.
- Photography/display corner: a neutral backdrop that doubles as inspiration space.
Furniture that works twice
Buy or adapt furniture for multi-function. I rely on a narrow table that’s both my work surface and a storage shelf. Some practical options:
- IKEA Linnmon tables or a smaller drop-leaf wall-mounted table — fold away after sessions.
- IKEA Alex drawers — slim and lockable; perfect for papers and mixed-media bits.
- Folding café tables for an occasional extra surface.
- Small utility trolleys (like the IKEA RÅSKOG) as mobile tool stations — they roll to wherever I need more space.
Vertical thinking: walls and doors are your friends
When floor space is finite, go up. I use walls for both storage and inspiration.
- Install narrow shelves high up for seldom-used materials.
- Use pegboards to hang scissors, rulers, tapes and masks; it’s easy to reconfigure as needs change.
- Magnetic strips are brilliant for metal tools (e.g., palette knives, scissors) and keep them visible and accessible.
Portable caddies and zone mobility
Design each micro-zone to be mobile. My work often moves from prep to making to photography in a single session; having portable containers saves time and avoids spreading mess.
- Use a shallow, divided tray for adhesives, glues, and small collage elements.
- Sturdy mason jars or Muji acrylic pots for brushes and pens — inexpensive and easy to clean.
- Small lidded boxes for wet media that need to be contained overnight.
Surface choices: durable, cheap, replaceable
If you have limited surface area, choose coverings that are hard-wearing and simple to replace. My favourites:
- Self-healing cutting mats for collage and cutting tasks.
- Heavy-duty vinyl tablecloths or painters’ tarpaulins that wipe down easily.
- Glass panels over a table make a terrific, smooth painting surface that’s easy to clean and can be swapped out when scratched.
Lighting and ventilation in a small space
Good light and air are non-negotiable for long sessions. If your corner has a small window, optimise it. If not, build light in:
- A daylight-balanced LED lamp (look for 5000–6500K) with adjustable arm — I use one that clamps to the table so it takes no additional footprint.
- Portable ventilating fans or extractor hoods for any solvent-based work. Even open-window cross-breezes help when using sprays or solvents.
- Consider clip-on daylight bulbs for colour-accurate viewing when photographing work for the site.
Storage strategies for mixed-media materials
Mixed-media means many small parts — papers, ephemera, inks, metallic foils. Keep like with like, and make the most-used items the most accessible.
- Flat storage for paper: a slim drawer or large folio case under the table.
- Vertical storage for rolls and larger sheets using an old magazine rack or a simple uprights-and-bungee setup.
- Zip-loc bags or clear pouches for findings and collage bits — label them and keep them in an upright file sorter.
- For paints and inks, use a shallow tray so you can lift your whole paint set at once.
Design a quick-clean routine
Part of making small spaces work is a five-minute tidy ritual after each session. I time it: 5 minutes to clear the work surface, 5 minutes to consolidate materials back into their homes. This prevents accumulation and turns the corner back into a livable space. Make cleaning accessible: keep wipes, a bench brush, and a small bin within arm’s reach.
Workflow tweaks that make a big difference
- Batch tasks: Do all your prep (gessoing, sizing) for a batch of supports at once so you’re not constantly switching set-ups.
- Interleave drying: Use a vertical drying rack or wire shelf so works can dry upright while you continue to work.
- Photograph as you go: A small, collapsible lightbox or neutral drop cloth hung on a clipboard makes documentation quick and reduces the need to move unfinished work.
- Use sketchbooks as portable studios: Keep small experiments and references in a field sketchbook that can move between zones.
Small investment items that multiply efficiency
There are a few purchases that pay off in small studios:
- A good clamp lamp or LED swing lamp (I use a daylight LED from BenQ for photographing colour-accurate images).
- IKEA Alex drawers or A4 shallow flat files for paper storage.
- Råskog trolley for a rolling tool station.
- A collapsible drying rack for layered collage pieces.
Example setups for different practices
Here are three compact configurations depending on whether your practice leans towards collage, painting, or mixed approaches.
| Practice | Key micro-zones | Must-have items |
|---|---|---|
| Collage-focused | Prep shelf, cutting mat, mobile caddy, vertical inspiration board | Cutting mat, glue tray, small lightweight flat files for papers |
| Painting-heavy (gouache/acrylic) | Wet station, wipeable surface, clamp lamp, small drying rack | Palette, water pots, daylight lamp, sealed paint pots |
| Mixed-media experiments | Portable tool trolley, multi-surface table, storage for odds & ends | Råskog trolley, shallow trays, zip pouches, magnet strip |
Keep the corner inspiring
Finally, make the corner one you enjoy returning to. Pin work-in-progress, a small rotating pile of inspiring images, or a shelf for a favourite material. In a tiny studio your environment is also your emotional workspace — keep it encouraging so that the practical efficiency doesn’t come at the cost of play.
These micro-zones have allowed me to maintain a flexible mixed-media practice without needing a large studio. The secret is less about perfect storage and more about designing small rituals and flows that suit the way you actually make. Experiment with one corner at a time, move things around, and keep notes on what saves you time — the best setups evolve through use.