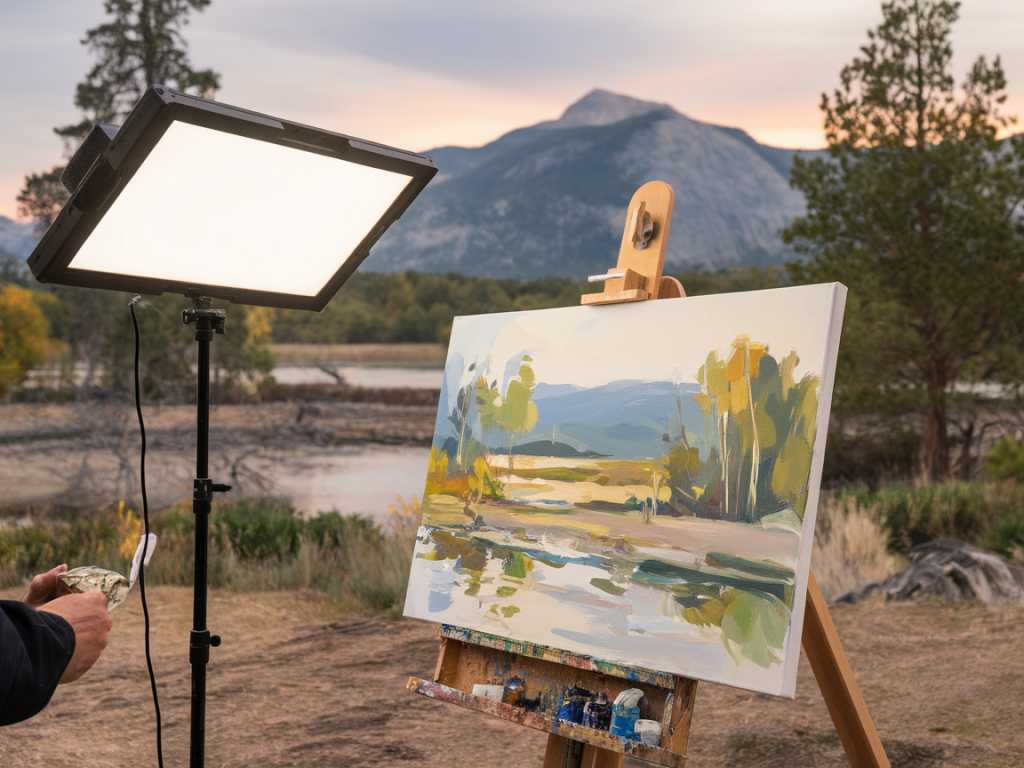
I take my painting outside as often as I can — there’s something about the day's shifting light, wind, and the odd passerby that keeps my practice alive and frank. Over the years I’ve tried a few solutions for portable light when the weather turns grey or when I want to extend a short golden hour: headlamps, clamp lights, even lanterns. Recently I started using small LED panels designed for photographers and videographers, and they’ve become a surprising staple in my plein air kit. Below I share what I’ve learned about why they work, which features matter, the common drawbacks, and practical battery tips so your panel won’t die midway through a session.
Why use a portable LED panel outdoors?
At first glance you might think: why add artificial light to the fresh-air experience? For me, the reasons are practical and creative. LED panels give a consistent, controllable light source when natural light is weak or inconsistent — on overcast days, under tree canopies, or when painting into dusk. They’re also useful for photographing work in progress under even lighting, or for evening workshops where I demonstrate techniques to a small group.
Most modern LED panels are lightweight, battery-powered, and dimmable. They can be mounted on small tripods or clipped to an easel. Compared to halogen or tungsten lamps, LEDs run cool and are far more energy-efficient — a big win when you’re carrying everything on foot or by bike.
Key features to look for
- CRI (Colour Rendering Index): Aim for CRI 90+ if you want colours to read accurately. Panels with CRI 95+ are excellent — they reveal subtle pigment differences that lower-CRI lights can flatten or distort.
- Colour temperature: Variable (bi-colour) panels that switch between 3200K and 5600K are versatile. If you prefer a fixed temperature, choose 5000–5600K for daylight balance unless you specifically want a warmer feel.
- Dimming range: A smooth dimmer from 0–100% is ideal. Some cheaper panels jump in large steps which can be frustrating when you’re trying to match ambient light.
- Size and weight: Small panels (e.g., 6–8 inches) are handier to carry and pack, but larger surfaces create softer, more pleasing light. Balance portability with the quality of wash you need.
- Mounting options: Look for a 1/4" thread or cold shoe mount and compatibility with small tripods or articulating arms. Some brands include magnetic pads or clamps which are handy for awkward setups.
- Diffusion: Built-in diffusion or a removable softbox gives a gentler light, which is nicer for painting because it avoids harsh specular highlights on wet paint.
- Water resistance and durability: Weatherproofing (IP rating) is a bonus. Many panels aren’t fully waterproof — keep them in a dry bag if rain threatens.
Brands and models I’ve tried
I’ve tested small panels from Aputure (Amaran series), Godox (LEDP series), Neewer and a couple of compact Yongnuo models. Aputure Amaran AL-M9 and Amaran 528 are common in my bag: the AL-M9 is tiny and handy for photographing studies, while the 528 gives a broader, softer coverage when painting. Godox panels strike a cost-effective balance; their CRI is decent and they often include useful mounting accessories.
| Model | Typical weight | CRI | Power | Best for |
|---|---|---|---|---|
| Aputure Amaran AL-M9 | 40 g | ~90 | Built-in battery, USB charge | Reference shots, tiny fill light |
| Aputure Amaran 528 | ~360 g | 95+ | NP-F battery or USB | Painting on easel, softer wash |
| Godox LEDP260C | ~650 g | 92 | AC / NP-F | Studio-style light outdoors |
| Yongnuo YN300 Air | ~350 g | 95 | NP-F battery | Budget-friendly, bi-colour |
Pros — what I love
- Control: I can dial in light level and temperature to match the mood I’m after or to stabilise a changing scene.
- Consistency: For multi-session studies or evening workshops, LED panels give repeatable lighting across days.
- Lightweight and efficient: Modern panels give lots of light for very little power and heat.
- Versatility: I use the same panel for painting, photographing work, and video when I record short process clips.
Cons — things to watch out for
- Battery limitations: Smaller panels have tiny built-in batteries. For long sessions you’ll need spare cells or an external power bank.
- Uneven colour rendition: Lower-cost panels may have poor CRI or odd spectral spikes that change how pigments appear.
- Harsh shadows from small sources: A small panel on its own can create hard edges and reflections on wet paint. Use diffusion, bounce, or a larger panel to avoid that.
- Weather vulnerability: Many units are not waterproof — exposure to damp or heavy rain can be risky.
Battery tips and power setups
Managing power is the practical heart of using LED panels outside. Here are the approaches that have saved my skin — and my painting sessions.
- Choose panels with multiple power options: Models that accept NP-F style batteries, USB power, and AC give flexibility. If the internal battery runs low, you can switch to an external source quickly.
- Carry spare NP-F batteries: For NP-F panels, bring at least one spare battery per two-hour session. Higher-capacity NP-F970s run longer but weigh more.
- Use USB-C PD power banks: Many panels now support USB-C fast charge or can be powered via USB. A 20,000 mAh power bank with USB-C PD (30–60W) will keep a panel running for many hours and can also charge your phone or camera.
- Monitor battery via indicators: Check the panel’s charge indicator and if possible keep an inline battery monitor — some panels don't clearly show remaining runtime when dimmed.
- Opt for lower power settings: Dimming by 30–50% often gives perfectly usable light and extends battery life disproportionately.
- Insulate batteries in cold weather: Cold kills battery capacity. Keep spare batteries in an inner pocket close to your body and swap them in as needed.
- Use efficient mounting to reduce light loss: A small tripod close to the easel prevents wasted spill and allows you to keep output lower while maintaining effective illumination.
- Have a quick-charge plan: If you have access to a car or mains during a field trip, choose batteries or banks that can be fast-charged between sessions.
Setup tips for painting
- Soften the light: Attach a small diffusion panel or use a sheet of tracing paper between the light and your canvas to remove harsh speculars.
- Positioning: Place the panel at roughly the same angle as your imagined light source for the painting — it helps your eye read plane changes correctly.
- Combine ambient and artificial: Don’t overpower natural light. Use the LED to fill and stabilise shadows rather than to replace the sun entirely unless that’s your intention.
- Keep weight minimal: If walking to a spot, choose a compact panel plus a small tabletop tripod — I find this combo beats hauling a large lamp and heavy stands.
There’s a little joy in finding solutions that let you keep working when conditions aren’t ideal. Portable LED panels aren’t a panacea — they shift the problem from chasing light to managing power and colour accuracy — but used thoughtfully they expand the hours and weather in which I can paint outside. If you’re considering adding one to your kit, think about where you’ll paint most often, the balance between size and light quality you need, and a realistic battery plan. In my experience, those three decisions make the difference between a light that sits in your bag and one you actually reach for every time you head outdoors.