I often get asked how I keep my brushes in good shape while avoiding harsh solvents. Over the years I’ve moved almost entirely to solvent-free methods for everyday cleaning and only use substitutes with caution for deep cleaning. Below I share the practical, hands-on routine I use in the studio — simple, repeatable steps that protect your tools, your health and the longevity of your brushes when working with oil paint.
Why go solvent-free?
For me the shift was partly health-driven and partly practical. Solvents like turpentine and white spirit are effective, but repeated exposure — even with ventilation — can leave you feeling off, and their fumes are unpleasant for long studio days. Solvent-free cleaning reduces fumes, eases studio maintenance and still does a great job if you follow the right sequence. It’s also kinder to natural-hair brushes, which can dry out and become brittle if repeatedly exposed to harsh chemicals.
What “solvent-free” actually means in practice
When I say solvent-free, I mean avoiding traditional petroleum solvents in the regular, day-to-day cleaning of brushes. That doesn’t mean you can’t use oils, soap and water, or specially formulated citrus-based or ester solvents occasionally — but these are used sparingly and with awareness of their properties.
Basic daily routine (my go-to after every painting session)
This is the routine I recommend for most oil painters because it’s fast, gentle and effective.
Remove excess paint: Wipe the brush on a rag or paper towel until most paint is off. Work the brush across the rag in one direction rather than scrubbing back and forth — it’s gentler on the ferrule and hairs.Oil pre-clean: Rub a small amount of vegetable oil (olive, sunflower or safflower) into the bristles if paint has started to dry. The oil loosens oil paint without stripping the brush’s natural oils. I keep a small jar of oil next to my sink for this.Soap the brush: Use a mild, non-drying soap — Savon de Marseille, a gentle hand soap, or a dedicated brush soap if you prefer. Work the soap into the bristles with warm water, forming a creamy lather. I gently pin the brush heel to the palm and rotate to work soap through the full length of the bristles.Rinse thoroughly: Rinse under warm running water until the water runs clear. Make sure to keep the ferrule angled downwards so water doesn’t sit in the handle or ferrule, which can loosen glue and rust the ferrule.Repeat if needed: If paint still shows, repeat the oil + soap step. For daily cleaning this usually does the job in one or two cycles.Reshape and dry: Gently reshape the tip and lay brushes flat on a towel to dry or rest them bristle tip out on a rack. Avoid standing brushes upright on their bristles while drying.Products I keep on hand
These are the types of items that make solvent-free brush care easy to maintain:
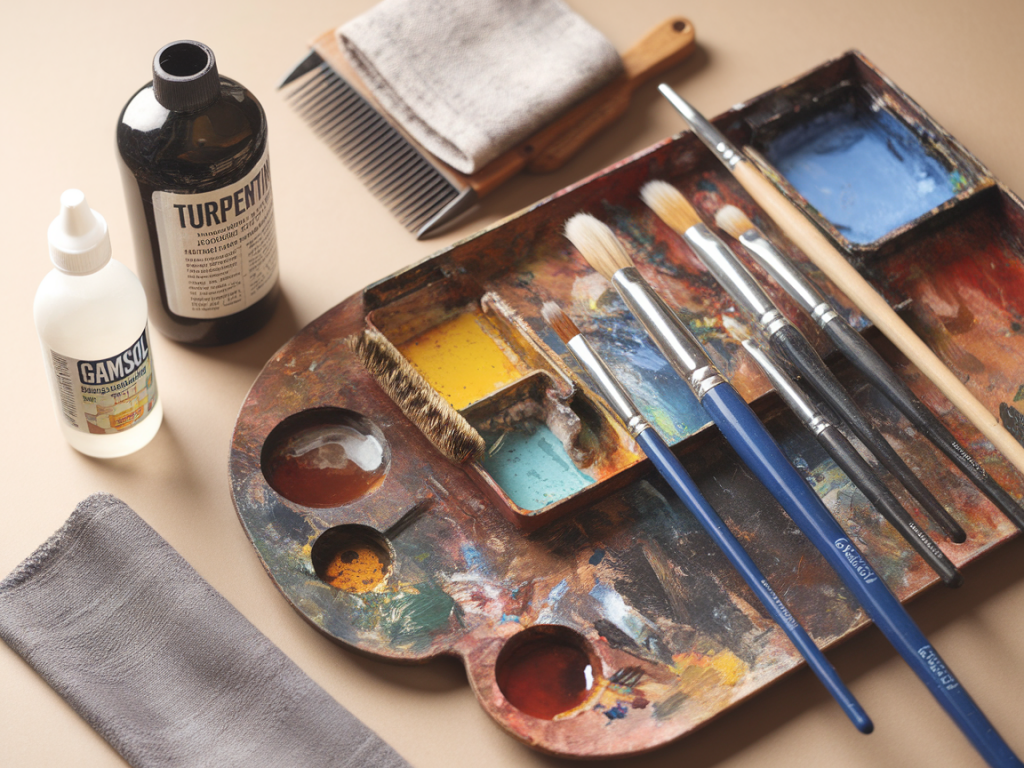
Vegetable oil (small jar) — sunflower or safflower are inexpensive and light.Mild soap — Savon de Marseille, gentle liquid hand soap or a purpose-made brush soap.Soft cotton rags and old microfibre cloths for wiping and initial clean.A jar of warm water and a shallow bowl for the soap lather.Brush rest or towel for drying flat; brush guards (plastic nets) for longer bristles.Dealing with stubborn paint and dried paint
For paint that’s started to cure on the bristles you’ll need a more intensive approach. I try to avoid this by cleaning regularly, but when it happens:
Soak the brush in warm oil (olive or linseed) for a few hours or overnight to soften the paint.Work the softened paint out with soap and lukewarm water. Use a gentle comb or an old toothbrush to comb the bristles if necessary.If paint is truly baked-in and the brush is valuable, consider a professional restoration product or a targeted solvent-based cleaner as a last resort. If you do use a citrus-based cleaner (e.g. Zest-It) or a mild ester solvent, do so in a well-ventilated area and test on a cheap brush first.Deep cleaning schedule
Even with regular daily cleaning, a monthly or bi-monthly deep clean helps keep brushes performing well. My deep-clean routine:
Strip with oil: Swirl brushes in a jar of vegetable oil to dissolve built-up paint and medium.Brush soap scrub: Use a dedicated brush soap and work thoroughly from ferrule to tip.Final rinse with warm water and a hair conditioner for natural bristles if they feel dry (very sparingly).Dry flat, reshape tips and store upright in a clean container once fully dry.Care for different brush types
Different brushes need different handling.
Natural-hair brushes (hog bristle, sable): Avoid prolonged contact with solvents — oil + soap is kinder. Don’t let them dry with paint in tip or ferrule.Synthetic brushes: More hardy with solvents but still benefit from gentle soap cleaning. They can be rinsed more vigorously and tolerate more frequent deep cleans.Long-handled brushes: Pay attention to water direction so glue in the ferrule isn’t weakened.Storage and ongoing maintenance
How you store brushes affects their life as much as how you clean them.
Store upright in jars only after they’re thoroughly dry, bristles up.Use brush guards for pointed brushes to protect tips.Avoid overcrowding: rubbing bristles together causes deformation.Every few months, check handles and ferrules for loose joints; a small drop of waterproof PVA inside the ferrule can re-seal a loosening handle, but only if you’re comfortable doing basic repair.Common mistakes to avoid
A few things I’ve learned the hard way:
Never leave brushes to soak in water for long periods — this will rot the wooden handle and loosen the ferrule.Don’t use hot water — warm is fine; hot can melt adhesives or warp handles.Avoid aggressive scrubbing across the ferrule — this is where hairs shed and damage begins.Final practical tips
I keep a small “cleaning station” beside my palette: a jar for used rag wipes, a jar for oil pre-soak (changed regularly), a bowl for soap lather and a towel for drying. It takes a minute between colour changes to clean a brush properly, and that small habit saves time and money in the long run.
Solvent-free cleaning isn’t about sacrificing results — it’s about being thoughtful and consistent. Try these steps, adapt them to your materials and climate, and you’ll notice brushes that keep their shape, feel and performance far longer.