There’s nothing quite like the sinking feeling when you lift a flap of collage and find brittle, cracked layers beneath — torn paper revealing white gashes, flaking paint, or adhesive failures that threaten the whole piece. I’ve walked into my studio to find a finished panel with a cracked collage layer after a hot weekend, or spotted tiny fissures spread across a layered work made years ago. Over time, materials settle, adhesives age, and environmental changes take their toll. But most of these problems can be fixed or at least stabilised with patience, simple tools and the right adhesive for the job.
Assessing the damage: what to look for first
Before you reach for glue, take time to examine the work. I always work under good light and use a magnifying loupe for close inspection. Ask yourself:
These observations guide whether you need a local patch, a relining, or a conservation approach. If the piece has high monetary or historical value, or contains materials like photographs or archival documents, consult a conservator before intervening.
Tools and materials I keep on hand
Over the years I’ve found a small kit covers most emergencies. My essentials are:
Understanding adhesives: PVA vs Golden Gel vs conservation glue
Choosing the right adhesive is often the key decision. Here’s how I think about the main options:
| Adhesive | Properties | Best uses | Reversibility |
|---|---|---|---|
| Archival PVA | Flexible, strong bond; dries clear; water-based; pH neutral options exist | Paper-to-paper joins, re-adhering lifted collage, general studio use | Moderately reversible with solvents or swelling; not ideal for photographs |
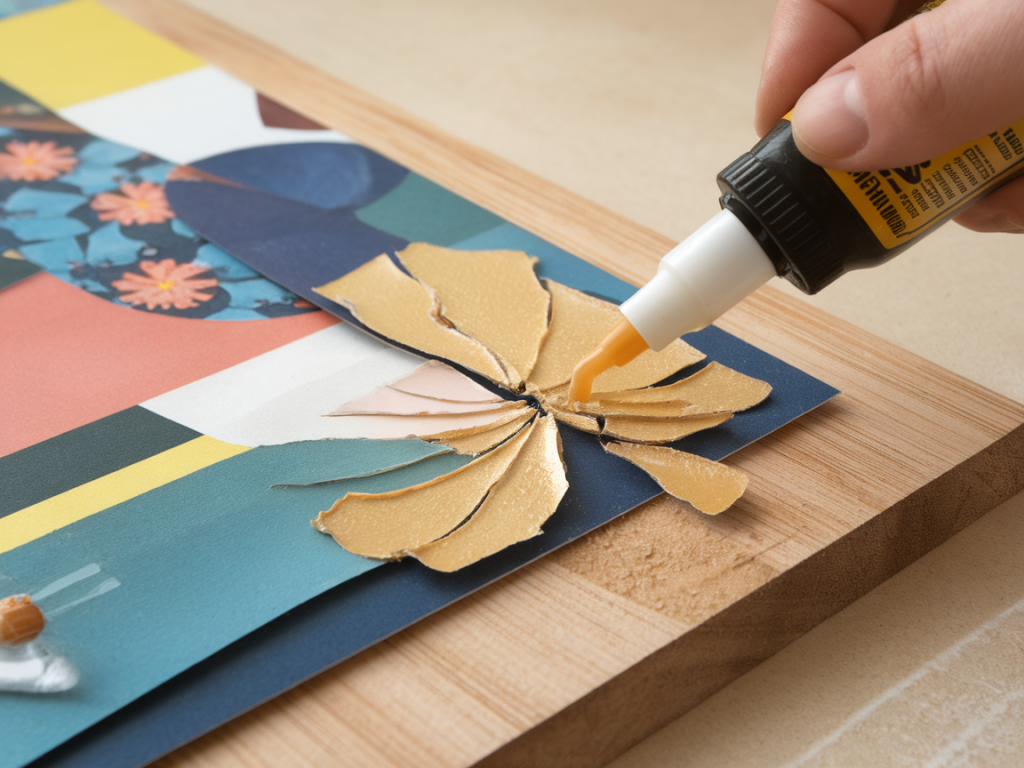
| Golden Acrylic Gel | Thicker, fills gaps, available in matte/gloss; very strong; flexible when dry | Layered collages requiring texture fill; missing fragments; bonding painted surfaces | Less reversible than PVA — remove mechanically or with strong solvents |
| Conservation glue (BEVA, Lascaux) | Formulated for reversibility and long-term stability; heat-activated options | Photographic prints, archival documents, high-value works | Designed to be reversible with heat or solvents — preferred for conservation |
In short: use archival PVA for everyday collage repair, Golden Gel when you need body and fill, and conservation adhesives for anything that must remain reversible and stable for decades.
Step-by-step fixes I use most often
Below are three practical repairs, arranged from simplest to more involved. Work gently and test on a scrap when in doubt.
1) Re-adhering a lifted edge or small flap
2) Filling a missing fragment or stabilising flaky collage
3) Relining or stabilising a severely delaminated panel
Testing, drying and finishing touches
Always test your adhesive on a spare piece of the same materials if you can. Drying time varies: PVA can take 24–72 hours to cure fully; Golden Gel may feel dry in hours but continues to settle over days. Keep the repair flat and protected from dust and direct heat as it cures.
Common pitfalls I’ve learned to avoid
When to call a conservator
There are times I hold back and seek professional help: photographic prints, highly valued works, pieces with historic significance, or when the material list is unknown (mixed media with plastics, adhesives, dyes). Conservators can diagnose underlying chemical instability and use solvents or techniques that are safe but not accessible in a typical studio.
Rescuing a cracked collage is usually a process of gentleness, careful decision-making and testing. With a modest kit and an understanding of adhesive properties — PVA for general mending, Golden Gel for fill and body, conservation glues for reversibility — you can stabilise many pieces at home and keep your layered surfaces looking like you intended.