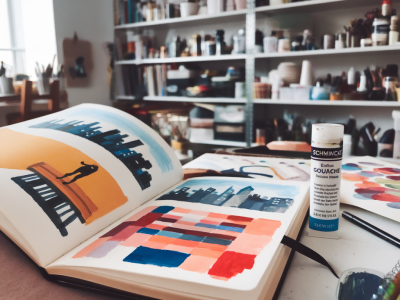
I love building layered collage backgrounds because they offer a rich, accidental language that can ground a painting, illustration or mixed-media piece. Working with found papers and acrylic medium creates depth, texture and surprises — and you don’t need a fancy studio to get started. Below I share my practical approach, favourite materials, workflow and troubleshooting tips so you can create layered, resilient grounds that invite mark-making and storytelling.
Materials I reach for
Here are the essentials I keep on my worktable. You can adapt this list depending on what you already have at hand.
Found papers: book pages, maps, ticket stubs, sheet music, packaging, old watercolour papers, newspaper clippings, envelopes. I always favour papers with some history — they add visual interest.Support: canvas board, heavyweight mixed-media paper (300gsm+), MDF panel or stretched canvas. For heavy collage I like a rigid support to prevent warping.Acrylic medium: PVA or matte medium for adhesion (e.g. Liquitex Matte Medium, Golden Soft Gel Medium - Matte). For a stronger bite I use a slightly tacky gel medium (soft or regular) as the sealing layer.Adhesive tools: wide synthetic brushes, a small palette knife, and a brayer or old credit card for smoothing.Paints and marks: acrylic paints, gouache, ink pens, charcoal, oil pastel. I often layer paint over and under papers.Extras: sandpaper (fine), gesso, masking tape, spray bottle for water, scissors and craft knife.My step-by-step process
This is how I typically build a layered collage background. I work intuitively, allowing earlier layers to peek through later ones.
Prepare the support: If your support is raw, I often give it one thin coat of gesso to control absorption. For a more absorbent surface leave it untreated. Tape the edges to create a neat border if you want a clean finish.Plan loosely: I don't sketch rigidly. Instead I think about a mood and a colour family. Lay out candidate papers on the support without adhesive to test composition and balance.Tear rather than cut: Tearing paper creates softer, more organic edges and reveals fibrous textures. If you need a straight edge, cut selectively.Attach the first layer: I apply a thin coat of matte medium to the support, place the paper, then smooth with a brayer or a flat tool to remove air bubbles. Keep excess medium around the edges — you can gently wipe it back with a rag.Build in stages: Add papers in stages, allowing partial drying between layers (10–30 minutes depending on humidity). I like to overlap edges and glue only parts of a sheet so corners lift slightly for later distressing.Integrate with paint: Once several papers are down, I begin to integrate them with thin washes of acrylic or watered-down gesso. This ties the collage into a more unified ground. Use transparent colours to preserve underlying pattern and texts.Add texture and marks: At this stage I add stencilling, torn bits of tissue, small scribbles in charcoal or ink, and drips. These marks read as both foreground and background depending on how much you obscure them later.Seal and strengthen: When the composition feels coherent, I seal everything with a final layer of medium — a slightly thicker soft gel gives a durable finish. Apply evenly with a wide brush and allow to dry thoroughly.Distress and reveal: Sand back small areas with fine sandpaper, or sand the edges to reveal underlying paper layers. A fine mist of water can loosen edges if you want to lift a corner and tuck in new material.Common questions I get asked
How do you prevent wrinkling when attaching thin papers?
Work with thin, even coats of medium and smooth from the centre outwards. Use a brayer or a clean flat tool to press gently. If paper wrinkles, let it dry fully then sand or re-adhere with a small bead of medium and a fingertip, smoothing carefully.
Can I use PVA glue instead of acrylic medium?
Yes — PVA is a good adhesive and often cheaper. However, some PVAs dry glossy and can become brittle over time. I prefer artist-grade acrylic matte medium for longevity and flexibility.
Will text and printed images show through paint?
They can if you use transparent paints or thin washes. To obscure text completely, add an opaque ground (gesso or titanium-white paint) before overpainting. Personally I enjoy bits of text peeking through; they create intriguing narratives.
Troubleshooting and fixes
Lifted edges: Rework edges with a small brush and medium, pressing down until set. For stubborn lifts, use a tiny amount of PVA beneath the loose area and press under a book until dry.Too glossy finish: If your sealed surface is too glossy, scuff lightly with fine sandpaper and add a thin coat of matte medium.Colour muddying: If your layers feel muddy, introduce a translucent glaze (acrylic mixed with medium) in a contrasting hue to unify and refresh the palette.Ways to add interest and depth
Here are techniques I use to keep backgrounds visually compelling:
Masking and revealing: Apply paper or tape masks before painting. Remove them to reveal crisp shapes and negative space.Transparent overlays: Use tissue paper or thin tracing paper with diluted colour to create soft, veiled layers.Embedded objects: Small, flat found objects — like stamps or fabric scraps — can be embedded beneath a thin wash of medium to become part of the palimpsest.Contrasting scales: Mix large blocks of colour with tiny printed patterns to create a sense of depth.Drying times and tips
| Layer | Approx. drying time |
| Thin layer of acrylic medium | 10–30 minutes |
| Thicker gel or seal coat | 2–6 hours (overnight for best stability) |
| Opaque gesso layers | 30 minutes–1 hour (longer if applied thickly) |
Humidity, temperature and the absorbency of your support affect drying times. I often work across several pieces so I can return to others while layers dry.
Finishing touches and next steps
Once your background is sealed and sanded lightly, it becomes a versatile ground for drawing, painting or collage. I sometimes transfer images, add figurative elements or leave the background as an abstract field to display as-is. Remember that part of the beauty in layered collage is the suggestion of narrative — resist the urge to overwork. Let the layers breathe.
If you’d like, I can share a simple demo video script or a printable checklist for a weekend collage session — say the word and I’ll put it together.