I’m often asked how I send fragile mixed-media pieces to galleries, buyers or events without returning to my studio with a heart in my mouth. Over the years I’ve developed a repeatable method for building a transport-safe portfolio that protects delicate surfaces and layered edges using archival board, corner clamps and a few practical tricks. Below I’ll walk you through the materials I use, the step-by-step build, and the small decisions that make a big difference for mixed-media work.
Why a custom portfolio matters for mixed-media work
Mixed-media pieces are deceptively vulnerable. A painting with collage, thick gouache, or raised passaggi will not fare well in a soft folio or loosely stacked with tissue paper. A good portfolio needs to do three things: hold surfaces rigidly to prevent flexing, protect raised or fragile edges from abrasion, and allow for quick, non-invasive packing and unpacking so a gallery can inspect work without risk. Using archival board and corner clamps gives you a lightweight, stiff shell that’s also sympathetic to the work.
Materials and tools I keep in my studio
I keep a ready-to-go kit so I can pack quickly after a show or before a courier arrives. Here’s what I use most often.
| Archival materials | Why |
| Archival foamboard or 100% alpha-cellulose backing boards (museum board) | Rigid, acid-free support that won’t off-gas or bend in transit |
| Glassine or unbuffered tissue | Layer that prevents sticking and abrasion against delicate paint and collage |
| Corner clamps (plastic or archival-friendly metal) | Keep multiple boards aligned and hold edges of the work without pressure on the surface |
| Archival paper corners/board corners | Protect the artwork’s corners and provide a buffer from clamps |
| Acid-free craft tape or linen tape | Secure boards together; reversible and archival |
| Foam edge protectors / corrugated board | Protect sides during stacking and transport |
| Rigid outer carrier (flat file box, strong mailing tube not suitable for flat work) | External protection in transit |
| Label materials (waterproof labels, cushion wrap) | Clear identification and extra shock absorption |
Brands I’ve used and trust include Crescent’s museum board, TALAS for archival supplies, and Frogtape or 3M archival tapes for non-invasive securing. Corner clamps come in many forms—plastic ones from hardware shops work well, or small spring clamps lined with foam for gentler grip.
Preparing the artwork
Work on a clean, dry table. I gently dust the surface with a soft brush and let anything still tacky or unstable cure fully before packaging. If something feels slightly loose—like a small collage edge—I use conservation-grade adhesive or wait rather than risk trapping it in a portfolio and causing further damage.
Measure the work (width, height and depth at the most raised point). Add 20–30 mm all around for breathing room and corner protection. For extremely fragile raised elements I add an extra 10 mm cushion in that area, using strips of archival foam to keep space between the surface and the board above.
Building the protective sandwich
Think of the portfolio as a sandwich: two rigid boards as outer slices, with protective layers and spacers inside. Here’s my standard build for a single sheet artwork:
- Lower layer: one sheet of archival museum board, face up.
- Between-board buffer: a full-sheet of glassine or unbuffered tissue laid carefully over the base board to prevent direct contact with the artwork backing.
- Artwork: place the artwork face up on the glassine. If the work is removable from a frame, keep it unframed for shipping unless the frame is sturdy and integral.
- Surface spacer: if there are raised areas, create localized spacers using strips of archival foam placed off the artwork surface (on the glassine) to prevent contact with the top board.
- Top protective layer: another full-sheet of glassine over the artwork.
- Upper board: second sheet of archival board placed carefully on top to complete the sandwich.
Align edges carefully so the stack is neat and square. I always avoid creasing the artwork while aligning; gentle nudges with a microspatula or bone folder (used outside the edges) help position things without touching the surface directly.
Using corner clamps and corners
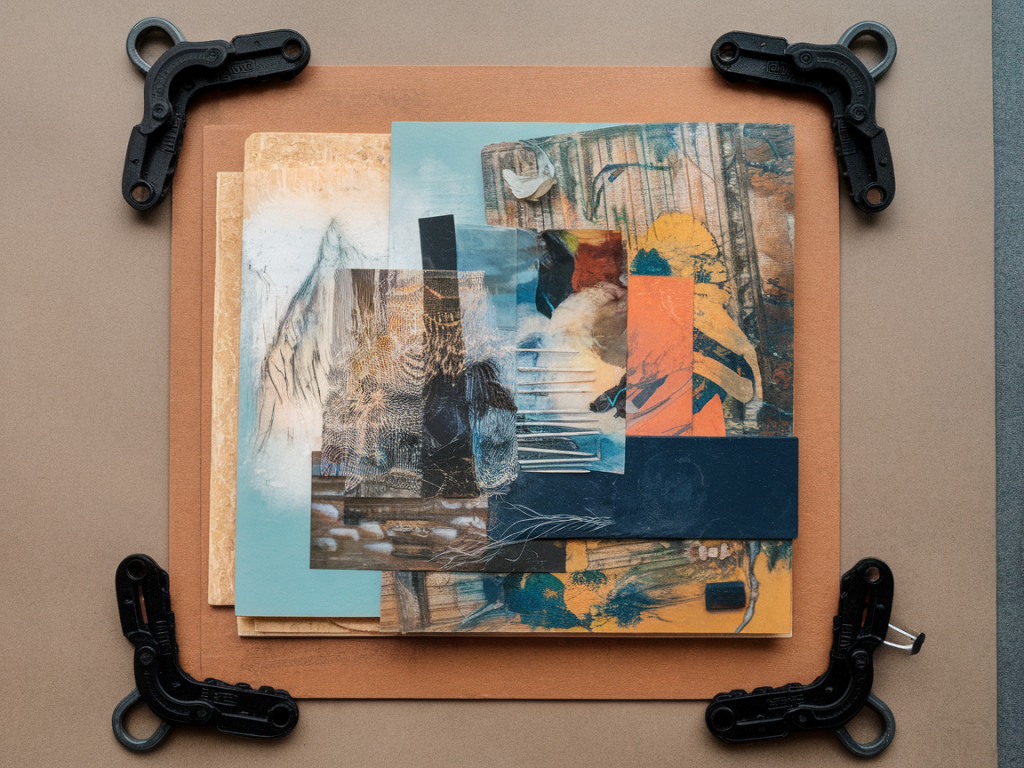
Corner clamps are the secret to repeatable, tension-free packing. Rather than compressing the sandwich with wide tape across the work, corner clamps hold the boards together and protect vulnerable edges.
- Place archival paper corners (pre-folded) on each corner of the artwork or on the board corners. These act as sacrificial pads between clamp and board.
- Slide the corner clamps onto the four corners of the board sandwich. If clamps are springy and strong, line them with thin foam or a strip of glassine to prevent marks.
- Do not over-tighten. The clamps should prevent sliding and flexing, not compress the layers. You want the artwork to ‘breathe’ while remaining stable.
- For larger portfolios holding multiple works, clamp every 2–3 works or every 30–40 cm to prevent slippage in transit.
Securing and labelling
Once clamped, I secure the bundle with strips of archival linen tape across the short edges of the board sandwich—never across the artwork itself. Tape should be applied to the outer board only so it can be removed without touching the artwork.
Label clearly on the outermost board: artist name, title, orientation (This side up), and a fragile notice. Use waterproof ink or pre-printed labels. If the portfolio will see a courier, add handling instructions and your contact details.
Packing into an outer case for transit
For short runs between studios and galleries I often use a rigid flat file box or a purpose-made flat portfolio case. For longer courier journeys I place the clamped sandwich into a slightly larger corrugated board tray, add foam edge protectors around the perimeter, and then slide the whole thing into a double-walled mailing box. Fill any remaining voids with acid-free crumpled tissue or archival foam chips so the sandwich cannot move.
Place ‘Do not bend’ and ‘Fragile’ labels on the outer box and consider double-boxing if the route includes several handovers. For international shipping or high-value pieces I request a specialist fine art courier and consider adding insurance and tracking.
Handling and unpacking tips I always share
- Advise the recipient to open the box in a clean, flat space and to remove corner clamps one at a time while supporting the board.
- Never slide a blade into the corner to open—use scissors away from the edges so nothing nicks the board.
- Keep glassine layers in place until the artwork is inspected; they protect against dust and abrasion.
- If the work needs to be framed on arrival, include a small label describing surface sensitivity and any recommended framing spacers or mounts.
Packing mixed-media is rarely exciting, but a reliable system frees you to focus on making rather than worrying about damage. Once you’ve built the core kit—archival boards, clamps, glassine and a few protective extras—you’ll be able to prepare pieces confidently and consistently, whether you’re shipping across town or across borders.