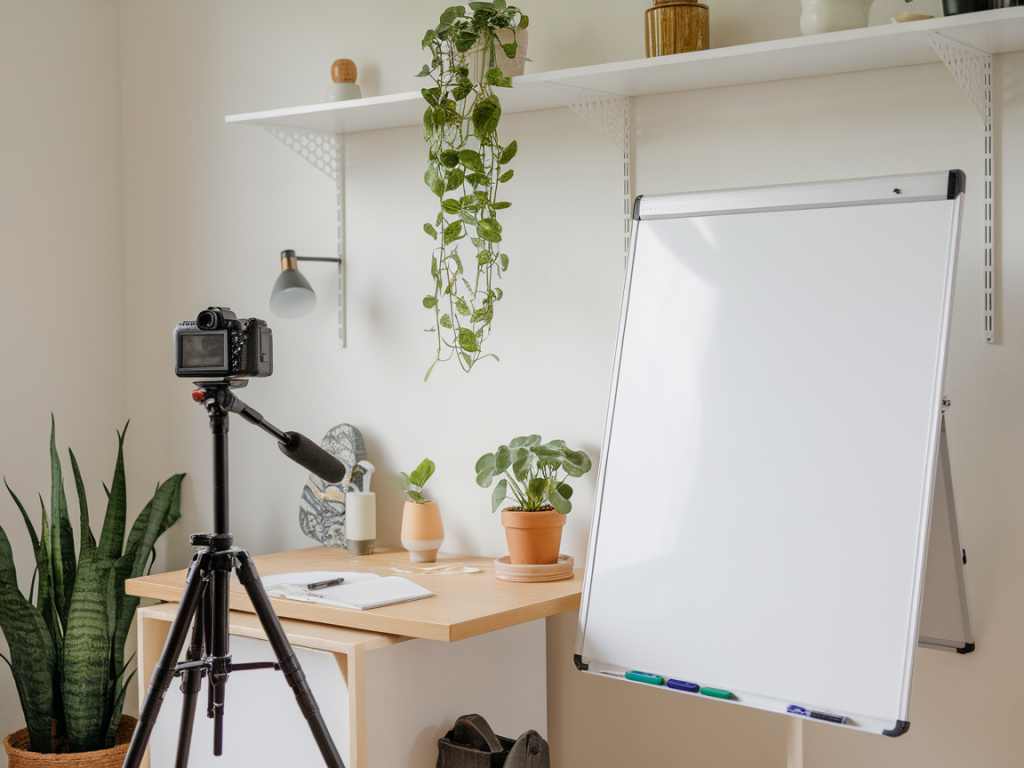
Turning a tiny corner of my studio into a portable live‑teaching setup was one of the best investments I’ve made in my practice. I wanted something compact that I could pack away between classes, quick to set up before a demo, and versatile enough to teach in person or stream online. Over several semesters of workshops and streamed demos for Sonriseartists, I refined an approach that balances quality with portability and a modest budget. Below I share the kit, layout and workflow that I actually use, with practical tips for troubleshooting and making the setup work in small spaces.
What I need from a portable teaching corner
Before buying anything I asked myself: what am I trying to teach, and where will I use it? For me that meant:
- Good overhead camera for close demonstrations — so students can see mark‑making at scale.
- Clear audio — my hands are busy but my voice must remain intelligible.
- Flexible lighting — soft, even light to avoid distracting shadows.
- Quick setup and teardown — I often teach in community rooms and at home.
- Minimal footprint — the corner is no bigger than 1.2 m × 0.8 m.
Essential kit I carry
I split my list into three tiers: budget, mid‑range (my usual), and pro. Here’s a compact table showing my go‑to items and alternatives.
| Role | My pick | Budget alternative |
|---|---|---|
| Overhead camera | Logitech Brio 4K on a ceiling boom / articulated arm | Logitech C920 on a tripod or smartphone with app |
| Microphone | Rode VideoMic NTG / wireless lavalier (Rode Wireless GO II) | USB lavalier or headset mic |
| Lighting | Elgato Key Light Air (or softbox panel) | Neewer LED panels or daylight desk lamps with diffusion |
| Mounting | Heavy‑duty clamp + articulated arm (Magic Arm + Super Clamp) | Gorillapod / cheap phone clamp tripod |
| Backdrop / surface | Removable hardboard or A1 gessoed panel | Cardboard covered in butcher paper |
| Streaming/software | OBS Studio with virtual camera, Zoom | Simple camera app + Zoom/Teams |
Choosing your camera and angle
For live demonstrations, the overhead or near‑overhead angle is the most informative. I prefer a true overhead when possible — looking straight down reduces distortion and lets students see brush contact and pressure. If you don’t have a ceiling rig, an articulated arm clamped to a table edge works well. My Brio gives a crisp image and handles colour nicely, but a modern smartphone can be just as good if you stabilise it and use a manual exposure app.
Key camera tips I learned the hard way:
- Lock exposure and white balance — so the image doesn’t flicker during the demo.
- Frame slightly zoomed out — so you can show the overall composition and also zoom in digitally without losing context.
- Test colour accuracy — have a small swatch or Grey Card in view to check colours in streaming software.
Audio: people notice poor sound first
Even a mediocre video looks professional if the audio is clear. I use a small shotgun mic on a boom for tabletop demos, or a wireless lavalier when I’m moving around. For teaching to groups in a room, I’ll pair the lav mic with a small portable PA. USB mics (like the Blue Yeti) are fine for seated talks but can pick up table noise during hands‑on demos.
Practical audio rules:
- Keep the mic 15–30 cm from your mouth for consistent level.
- Use a windscreen to soften breath noises if the mic is close.
- Record locally as a backup when possible — Zoom can drop frames or audio if the connection wobbles.
Lighting and seeing surface textures
I aim for two soft lights at roughly 45° to the surface to reduce hard shadows. Small LED panels with adjustable colour temperature are perfect because you can match them to daylight or warmer indoor light. I sometimes use a single overhead softbox for an even scrub of light; the downside is reflections on glossy varnishes — polarising films or angling the light helps.
- Diffusion is your friend — bake lamps with tracing paper or a softbox for even light.
- Place lights slightly higher than the camera to avoid glare in wet media.
- Colour temperature around 5000–5600K usually matches daylight bulbs and makes white paper read accurately.
Workspace layout: keeping it ergonomic
In a small corner I use a foldable table and an adjustable drafting stool. Keep your most used materials in a small caddy to the side so you don’t have to get up constantly. I also prepare two identical demo panels — that way I can continue talking while one is drying or being photographed.
A practical setup checklist I run through before each session:
- Camera mounted and tethered to laptop
- Mic powered and levels checked
- Lights positioned, diffused and white balanced
- Background cleared of clutter
- Spare batteries and an HDMI/USB cable hub ready
Packing and transport
I keep everything in two bags: a hard case for stands/arms and a padded tote for electronics. A single articulated arm and a compact LED panel fold down small, and the Brio or a phone fits into a small accessory pouch. If you teach offsite frequently, number your cables and pack spares — I’ve saved sessions by carrying an extra USB‑C cable.
Common problems and quick fixes
- Flickering lights — change to a higher quality LED driver or try a different mains socket; cheap LEDs can cycle with dimmers.
- Loose camera mount — add a secondary clamp or a small weight to the base to stabilise the arm.
- Echoy room — place a blanket or foam behind you to dampen reflections; rugs help too.
- Software crashes — close unused apps and run a simple test meeting 10–15 minutes before the start.
Teaching tips for online and hybrid classes
I find interaction keeps energy high. Ask students to respond with a one‑word colour choice or to show a quick photo of their work in the chat. Use breakout rooms for hands‑on practice, and keep a pause every 10–15 minutes to answer questions and show a close‑up. Record at a slightly higher bitrate if you plan to reuse footage for tutorials.
If you want a short starter kit that will cover most needs: a reliable webcam (or phone), one soft LED panel, a lavalier mic, and a sturdy clamp arm will get you taught‑ready in a tiny corner. I refined this setup slowly — and each tweak made teaching smoother, freed me to focus on process rather than technical worries, and helped my students feel like they were right there with me at the table.